I went grocery shopping and stocked up on the usual items. When I came home I realized we had way too much milk and bread and a lot of eggs. So for the weekend, I decided to make bread pudding.
This is what it looked like, ready for the oven. I used a multigrain bread.
And here's the first serving, cooled and topped with whipped cream. I added a drizzle of maple syrup.
My recipe:
6 slices of slightly dried out bread
2 tablespoons melted butter
1/4 - 1/2 cup raisins
4 eggs
2 cups lowfat milk
3/4 cup sugar
1 teaspoon cinnamon
1 teaspoon vanilla
Tear up the bread into pieces and place into an eight inch baking dish.
Top with melted butter.
Scatter raisins over the bread.
Beat together the milk, sugar, cinnamon, and vanilla.
Pour mixture over the bread and raisins.
With a fork, push down the bread to soak up the liquid.
Bake in a 359 degree oven for about 45 minutes.
This was easy to make and a great way to use up some of our milk, bread, and eggs. Nice treat for the weekend.
Translate
Saturday, February 28, 2015
Friday, February 20, 2015
Polish Donuts
Paczki!
My parents
were Polish and we sometimes had Polish food when I was growing up. But Mom never
made paczki, although I know other relatives who did.
Paczki are
Polish jelly-filled donuts that are especially popular just before the beginning
of Lent. Where we live, I do not know of any bakeries who sell them. So when I
found a recipe for baked (and not deep-fried) donuts, I just had to try to
make them myself. So the Tuesday before Ash Wednesday I was in the kitchen with
my new recipe.
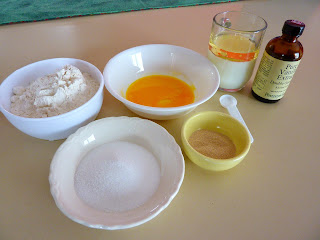
I set out the ingredients.
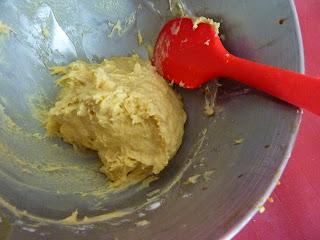
My Kitchen Aid mixer did a great job of making the dough. The recipe called for 1/4 cup additional flour at the end so that the dough could be kneaded, but I found that I needed to use at least 1/2 cup.
Next was the kneading process - 50 turns - and then the dough was ready to rest for 10 minutes. (After all that kneading, I also needed a rest.)
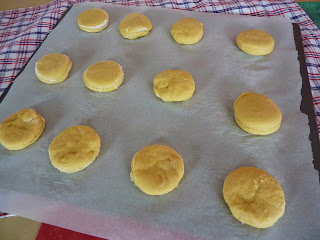
Then it was time to roll out the dough, cut into 12 round portions, and place on the baking pan. Here the donuts would rise until puffy, about 45 minutes - 1 hour.
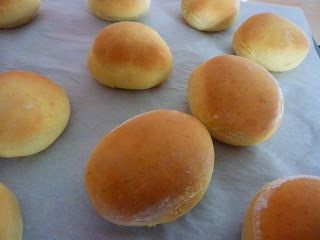
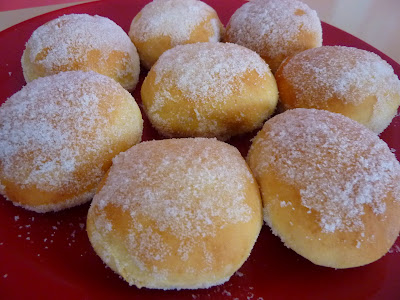
Next they went into the oven. Here's what they looked like when they came out, slightly browned on top and bottom.
While they were still warm, I spread melted butter on each one and placed each in a baggie to shake to coat with sugar.
The traditional paczki are filled with jelly, or even custard. Instead I opted to serve them plain with strawberry jam or fig butter on the side.
These were fun to make, and it was a chance for me to connect once again with my Polish heritage.
We ate some, and Geo gave away the rest! So this weekend I'll be back in the kitchen with my recipe making more paczki.
Recipe:
Ingredients:
- 1
1/2 cups all purpose flour
- 1/4
cup sugar
- 1/4
teaspoon salt
- 2
teaspoons yeast (instant or regular)
- 2/3 cup
lowfat milk – warmed to 120° for instant/110° for regular yeast
- 3
Tablespoons oil (canola or extra light olive oil)
- 2
egg yolks
- 1/2
teaspoon vanilla
- ¼ - ½
cup additional flour
- 1
Tablespoon melted butter
- 1/3
cup sugar for coating
- 1
cup thick jam, custard, or filling of choice. (Optional)
Instructions:
1. Place flour, sugar,
salt, & yeast in large bowl.
2. Stir in warm milk, followed
by oil, egg yolks & vanilla.
3. With electric mixer,
beat for 2 minutes on high speed.
4. Stir in enough flour
until the dough holds together.
5. Place dough on a
floured surface and knead 50 turns, cover with plastic and let rest 10 min.
6. Line a large baking
sheet with parchment paper.
7. On a floured surface,
roll dough 1/2-inch thick. Cut circles using a 2 1/2 -inch round cutter, dipped in flour. Re-roll scraps.
8. Place portions on
baking sheet, cover with a towel, and let rise in a warm spot about 45
minutes.(1 hour at room temp). After 30 minutes, preheat oven to 375° F.
9. When paczki are puffy, but not necessarily doubled in size, bake for 10 minutes.
10. Meantime, melt butter and place 1/3 cup sugar in a plastic produce
bag.
11. Remove paczki immediately from pan to wax paper. Brush each one
while warm with melted butter and shake them in a bag to coat with
sugar.
12. If filling, use a pastry bag with a long slender tip, pushing into
the side. Serve immediately.
To see my newest blog, please go to Resolutions.
Thank you for following!
Thursday, February 05, 2015
Snow Cake
I had just finished shoveling snow, came into the house, and sat down to look at our local paper. In it there was a recipe from the Rumford Complete Cookbook from 1932 - Snow Cake. Perfect for a snow day like today, I thought. I would make this for dinner.
I began by whisking the egg whites in my Kitchen Aid mixer until they were frothy. I poured the whites into another dish until needed.
I began by whisking the egg whites in my Kitchen Aid mixer until they were frothy. I poured the whites into another dish until needed.
I switched to the paddle attachment and, in the same mixing bowl, I creamed together the butter and sugar, then added vanilla. The butter creams best when it is at room temperature, or slightly softened. I used unsalted butter.
After I blended the flour and baking powder together, I added it to the butter mixture - a little at a time - alternating with the milk and egg whites.
When the batter was ready, I poured it into a greased 8 x 8 inch baking dish. It looked like a buttercream frosting! It went into a 350 degree oven for about 1/2 hour.
The vanilla aroma was amazing as the cake was baking. (I had accidentally added 2 teaspoons - NOT 1/2 teaspoon - and the flavor in the finished product still came out very well.)
This cake would be great with frosting and fresh fruit for garnish. I decided just to use whipped cream and fruit - an organic mix of berries that I thawed while the cake was baking.
Here's the dessert.
Ingredients for Snow Cake:
1/4 Cup butter
Scant 1 cup sugar
1/2 teaspoon vanilla (or more to taste)
2 egg whites
1 and 1/2 Cups flour
2 teaspoons baking powder
1/2 Cup milk
The recipe is a keeper, and one I'll be using again, even when we DON'T have snow to shovel!
Monday, February 02, 2015
Photography Exhibit
I enjoy taking photos. When I heard that there was a new photography exhibit at the Shelburne Museum, I was eager to see it. The exhibit is titled Kodachrome Memory: American Pictures, 1973 - 1990.
Geo and I went with friends to the museum for a presentation by the photographer Nathan Benn. Mr. Benn was a photographer with National Geographic when he was assigned to a project in Vermont in 1972. He was to capture images of everyday life in this very rural state. Choice photos were published in 1973, but most went into a box that he first examined about ten years ago. Some of these images are the ones on exhibit.
After his presentation, we went to see his work.
Geo is looking at an enlarged photograph of spools from the Vermont Spool and Bobbin factory in Burlington that had closed in 1976. The photo looks almost like a painting.
This was one of my favorites. It was taken on a farm in Fair Haven, Vermont.
The original slides of the photos are under glass. There's a magnifying glass there to look at them more closely.
What I like about photography is that it captures moments in time that can be revisited again and again. The photographer interprets what he or she see through prospective and composition, and directs our attention to details of objects and events that we could otherwise easily miss.
A good photograph tells a story, and Mr. Benn is truly a master storyteller.
Subscribe to:
Comments (Atom)


